


My First Time Hanging A Gallery Wall With Picture Rail Rods (So Easy And Looks So Good!)
Robyn and Ryan (two of our best friends) have this gorgeous 100-year-old home (see the intro post here) that has picture molding near the crown, which gave us an opportunity to use picture rods (art rods?) for the gallery wall ... The post My First Time Hanging A Gallery Wall With Picture Rail Rods (So Easy And Looks So Good!) appeared first on Emily Henderson.

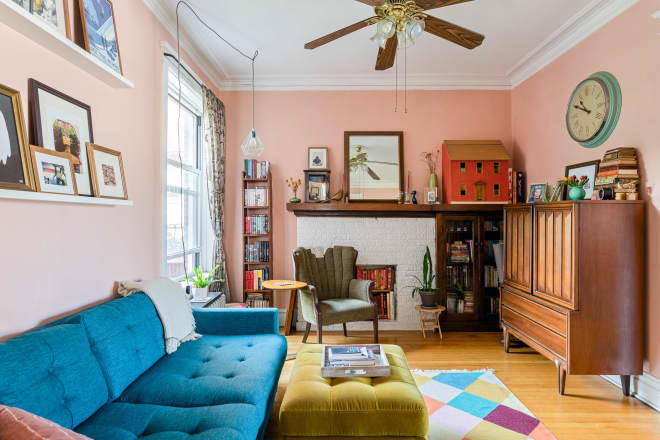
Robyn and Ryan (two of our best friends) have this gorgeous 100-year-old home (see the intro post here) that has picture molding near the crown, which gave us an opportunity to use picture rods (art rods?) for the gallery wall above the sofa. I had bought most of these pieces for their basement in their former house (one of my favorite projects ever) and this wall is kinda boring with no architectural interest. I saw these picture rods at Nickey Kehoe years ago but never had a project with picture moldings (which has a built-in ledge for this exact purpose) so this was my time. Now, you could also use clips and wire/string/fishing line to individually hang each piece of art, but we were wanting to hang a gallery wall of sorts here so we chose an easier (and really pretty) way. Using these rods would allow us to do that since you can add as many on each rod as can fit (whereas if you were to hang it on a picture clip you’d have that triangle shape of the wire/string that would overlap with the other art in the gallery, if that makes sense). I love the flexibility of these.
Art Rod How-To

The rods are sold separately and come in a variety of lengths. We bought four 5′ rods that were $26.99 each, along with eight adjustable monkey hangers that you slide onto the rod. You can cut the rods down after you determine where the art ends on the wall or buy shorter ones if you feel confident about the length.

They are extremely fun and easy – just set into the ridge in the trim, holding very confidently and you slide on each monkey hanger and move it up or down based on what you are hanging. Everything is forever adjustable with zero holes and zero commitment. You know I’m a huge fan of that:)


The hooks stay due to the leverage and weight of the art once it’s on – and again so easy to adjust up or down, add more, take off, etc. I can’t recommend these enough! Plus they are very pretty.

Watch it populate – How fun is this? And we made a reel about it over on IG if you want to see my hanging it in action.

We played around with the composition for a while – you could obviously just have one big piece (which I think would look best hanging on two rods) or four/six pieces that hang on top of each other across the wall. What you can’t do is hang anything in between the rods as by nature of them you have to “stack” the pieces. I loved this constraint and we were able to take all the pieces that we had collected before (as well as the new one we bought at Rose City Vintage Market) which anchored the collection. All in all, it was a little over $100 as we used 3 of the rods and 8 monkey hangers. Come back and see the reveal real soon and how the gallery wall looks with the rest of the design:)
*Photos by Kaitlin Green
The post My First Time Hanging A Gallery Wall With Picture Rail Rods (So Easy And Looks So Good!) appeared first on Emily Henderson.