


.png)


![‘Companion’ Ending Breakdown: Director Drew Hancock Tells All About the Film’s Showdown and Potential Sequel: ‘That’s the Future I Want for [Spoiler]’](https://variety.com/wp-content/uploads/2025/02/MCDCOMP_WB028.jpg?#)


Essential CLI/TUI Tools for Developers
As developers, we spend a lot of time in our terminals. And there are tons of great CLI/TUI tools that can boost our productivity (as well as some that are just fun to use). From managing Git repositories and navigating file systems to monitoring sys...

As developers, we spend a lot of time in our terminals. And there are tons of great CLI/TUI tools that can boost our productivity (as well as some that are just fun to use). From managing Git repositories and navigating file systems to monitoring system performance and even playing retro games, the command line offers a powerful and versatile environment.
In this article, we’ll go through a collection of CLI / TUI tools that have been widely adopted in the developer community, spanning various categories such as version control, system utilities, text editors, and more. I wanted to give you a diverse selection that caters to different needs and workflows.
For each tool, I’ll include an overview, highlighting its key features and use cases, along with clear and concise installation instructions for various operating systems, ensuring you can quickly get up and running with these valuable command-line companions.
Table of Contents
Kubernetes Tools
k9s — Kubernetes CLI To Manage Your Clusters In Style
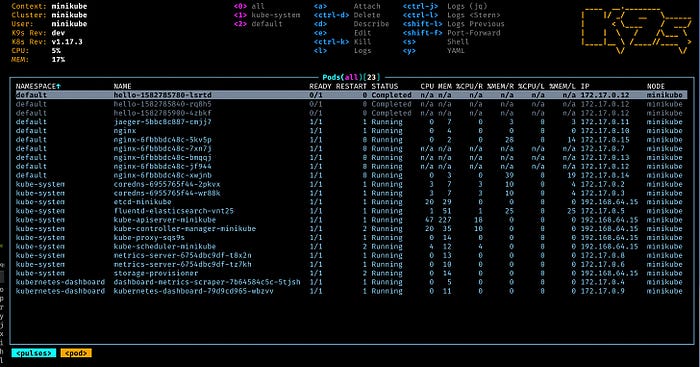
K9s is a must-have tool for anyone working with Kubernetes. Its intuitive terminal-based UI, real-time monitoring capabilities, and powerful command options make it a standout in the world of Kubernetes management tools.
The K9s project is designed to continually watch Kubernetes cluster for changes and offer subsequent commands to interact with observed resources. This makes it easier to manage applications, especially in a complex, multi-cluster environment. The project’s aim is to make Kubernetes management more accessible and less daunting, especially for those who are not Kubernetes experts.
Just launch k9s in your terminal and start exploring the Kubernetes resources with ease.
To install K9s:
# via Homebrew for macOS
brew install derailed/k9s/k9s

# via snap for Linux
snap install k9s --devmode

# via Chocolatey for Windows
choco install k9s

# via go install
go install github.com/derailed/k9s@latest
kubectx — switch between contexts (clusters) on kubectl faster.
Kubectx is the most popular tool for switching Kubernetes contexts, but it has the fewest features! It displays all the contexts in your Kubernetes config as a selectable list and lets you pick one. That’s it!
This project comes with 2 tools:
kubectx is a tool that helps you switch between contexts (clusters) on kubectl faster.
kubens is a tool to switch between Kubernetes namespaces (and configure them for kubectl) easily.
These tools make it very easy to switch between Kubernetes clusters and namespaces if you work with many of them daily. Here you can see it in action:

To install kubectx:
# via Homebrew for macOS
brew install kubectx

# via apt for Debian
sudo apt install kubectx

# via pacman for Arch Linux
sudo pacman -S kubectx

# via Chocolatey for Windows
choco install kubens kubectx
kubescape — Kubernetes security platform for your IDE, CI/CD pipelines, and clusters.
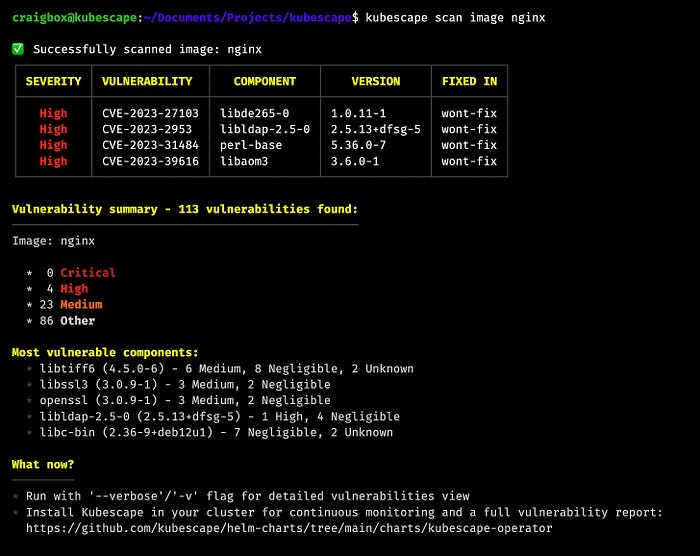
I hope you take the security of your Kubernetes clusters seriously. If so, kubescape is really great for testing if your Kubernetes cluster is deployed securely according to multiple frameworks.
Kubescape can scan clusters, YAML files, and Helm charts and detects the misconfigurations according to multiple sources.
I usually use it in my CI/CD to scan for vulnerabilities automatically when changing Kubernetes manifests or Helm templates.
To install kubescape:
# via Homebrew for macOS
brew install kubescape

# via apt for Debian
sudo add-apt-repository ppa:kubescape/kubescape
sudo apt update
sudo apt install kubescape

# via Chocolatey for Windows
choco install kubescape
Container Tools
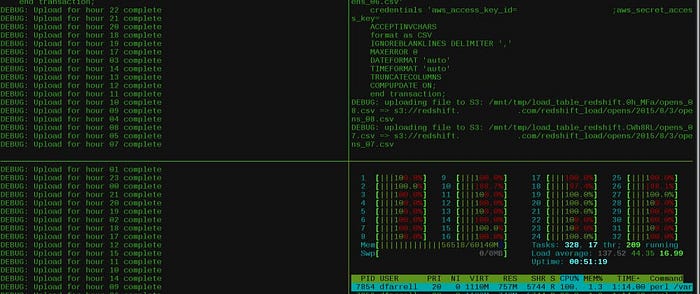
ctop — A top-like interface for container metrics.
ctop is basically a better version of docker stats. It provides a concise and condensed overview of real-time metrics for multiple containers. It comes with built-in support for Docker and runC, and connectors for other container and cluster systems are planned for future releases.
Using ctop is simple. Once you have the tool open, you’ll see all of your currently active containers listed.
To install ctop:
# via Homebrew for macOS
brew install ctop

# via pacman for Arch Linux
sudo pacman -S ctop

# via scoop for Windows
scoop install ctop
lazydocker — A simple terminal UI for both docker and docker-compose.
While Docker's command-line interface is powerful, sometimes you might want a more visual approach without the overhead of a full GUI. This is especially true when managing Docker containers on a headless Linux server where installing a web-based GUI might be undesirable.
Lazydocker was created by Jesse Duffield to help make managing docker containers a bit easier. Simply put, Lazydocker is a terminal UI (written in Golang) for the docker and docker-compose commands.

To install lazydocker:
# via Homebrew for macOS
brew install lazydocker

# via Chocolatey for Windows
choco install lazydocker

# via go install
go install github.com/jesseduffield/lazydocker@latest
dive — A tool for exploring each layer in a Docker image.
A Docker image is made up of layers, and with every layer you add on, more space will be taken up by the image. Therefore, the more layers in the image, the more space the image will require.
That’s where dive shines, it helps you explore your Docker image and layer contents. It can also help you find ways to shrink the size of your Docker/OCI image.
To install dive:
# via Homebrew for macOS
brew install dive

# via pacman for Arch Linux
pacman -S dive

# via go install
go get github.com/wagoodman/dive
File and Text Tools
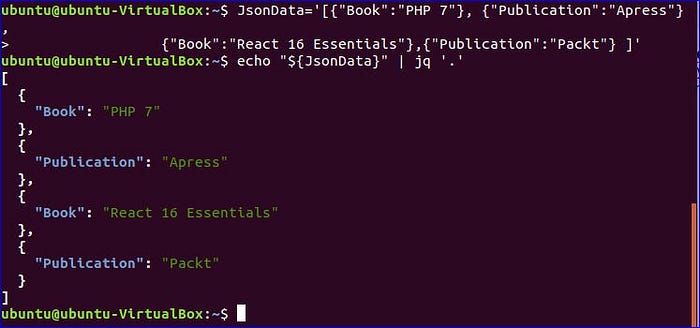
jq — Command-line JSON processor.
You may be aware of this one already as it’s well known in the developer community.
Unfortunately, shells such as Bash can’t interpret and work with JSON directly. That’s where you can use jq as a command-line JSON processor that’s similar to sed, awk, grep, and so on for JSON data. It’s written in portable C and doesn’t have any runtime dependencies. This lets you slice, filter, map, and transform structured data with ease.
To install jq, you can download the latest releases from the GitHub release page.
bat — A cat(1) clone with wings.
This is the most used CLI on my machine currently. A few years ago it was cat, which is great but doesn’t provide syntax highlighting, or Git integration
Bat’s syntax highlighting supports many programming and markup languages, helping you make your code more readable directly in the terminal. Git integration lets you see modifications in relation to the index, highlighting the lines you’ve added or changed.
Simply run bat filename and enjoy its output.

To install bat:
# via Homebrew for macOS
brew install bat

# via apt for Debian
sudo apt install bat

# via pacman for Arch Linux
pacman -S bat

# via Chocolatey for Windows
choco install bat
ripgrep — Recursively search directories for a regex pattern while respecting your gitignore.
ripgrep is definitely becoming a popular alternative (if not the most popular) to the grep command. Even some editors like Visual Studio Code are using ripgrep to power their search offerings.
The major selling point is its default behavior for recursive search and speed.
I now rarely use grep on my personal machine, as ripgrep is much faster.
To install ripgrep:
# via Homebrew for macOS
brew install ripgrep

# via apt for Debian
sudo apt-get install ripgrep

# via pacman for Arch Linux
pacman -S ripgrep

# via Chocolatey for Windows
choco install ripgrep
Git Tools
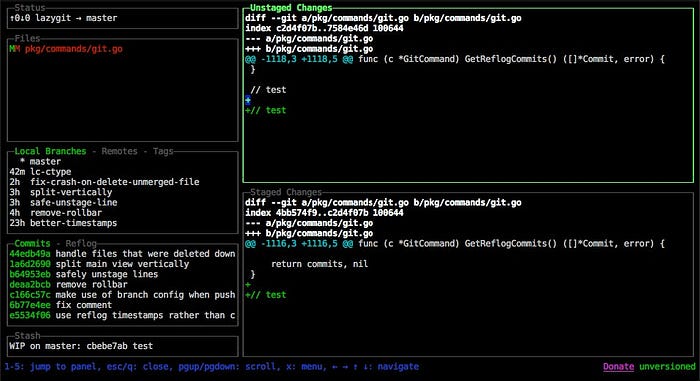
lazygit — Simple terminal UI for git commands.
lazygit is another great terminal UI for Git commands developed by Jesse Duffield using Go.
I don’t mind using the Git CLI directly for simple things, but it is famously verbose for more advanced use cases. I am just too lazy to memorize longer commands.
And lazigit has made me a more productive Git user than ever.
To install lazygit:
# via Homebrew for macOS
brew install jesseduffield/lazygit/lazygit

# via pacman for Arch Linux
pacman -S lazygit

# via scoop for Windows
scoop install lazygit
Development Tools
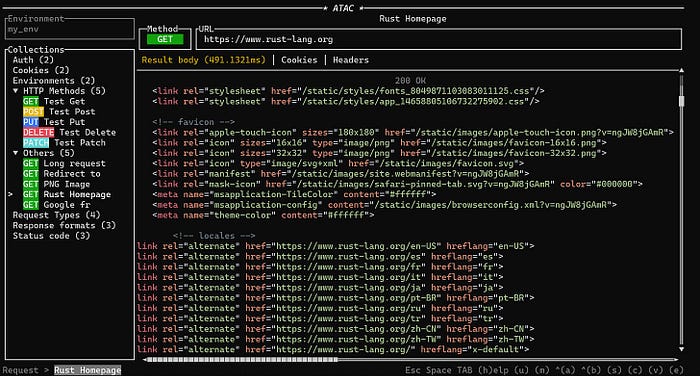
ATAC — A simple API client (Postman-like) in your terminal.
ATAC stands for Arguably a Terminal API Client. It’s based on popular clients like Postman, Insomnia, and Bruno, but it runs inside your terminal without needing any particular graphical environment.
It works best for developers who need an offline, cross-platform API client right at their fingertips (terminal).
To install ATAC:
# via Homebrew for macOS
brew tap julien-cpsn/atac
brew install atac

# via pacman for Arch Linux
pacman -S atac
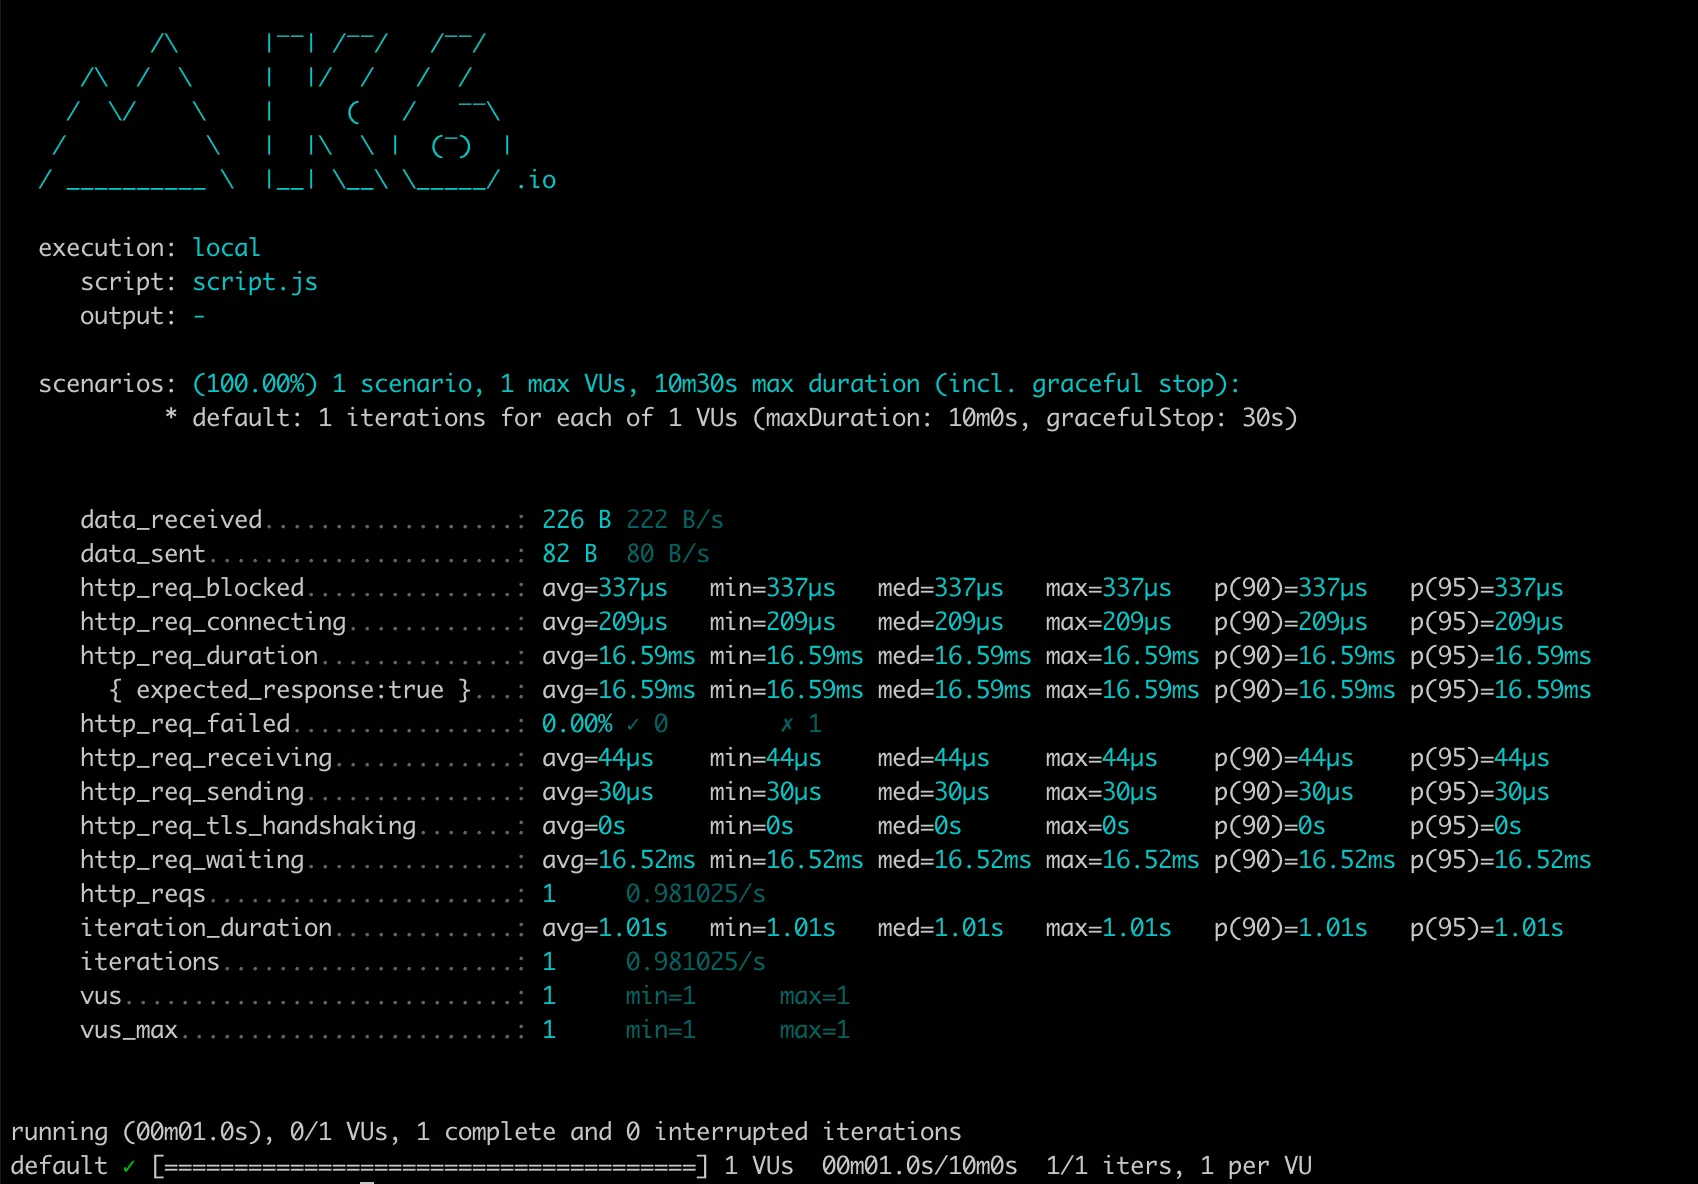
k6 — A modern load testing tool, using Go and JavaScript.
I’ve used many load-testing tools in my career, such as vegeta or even ab in the past. But now I mostly use k6s as it has everything I need and has a great GUI and TUI.
Why it works well for me:
k6 has really good documentation
Many integrations available: Swagger, JMeter scripts, and so on.
Results reporting is quite good
To install k6:
# via Homebrew for macOS
brew install k6

# via apt for Debian
sudo apt-get install k6

# via Chocolatey for Windows
choco install k6
httpie — modern, user-friendly command-line HTTP client for the API era.
Don’t get me wrong, curl is great, but not very human-friendly.
HTTPie has a simple and expressive syntax, supports JSON and form data, handles authentication and headers, and displays colorized and formatted output.

To install httpie:
# via Homebrew for macOS
brew install httpie

# via apt for Debian
sudo apt install httpie

# via pacman for Arch Linux
pacman -Syu httpie

# via Chocolatey for Windows
choco install httpie
asciinema — Terminal session recorder.
I call it a terminal YouTube :)
asciinema is a great tool when you want to share your terminal sessions with someone else, instead of recording heavy videos.
I use it often when I develop some CLI tools and want to share the demo of how they work (on GitHub, for example).

To install asciinema:
# via Homebrew for macOS
brew install asciinema

# via apt for Debian
sudo apt install asciinema

# via pacman for Arch Linux
sudo pacman -S asciinema
Networking
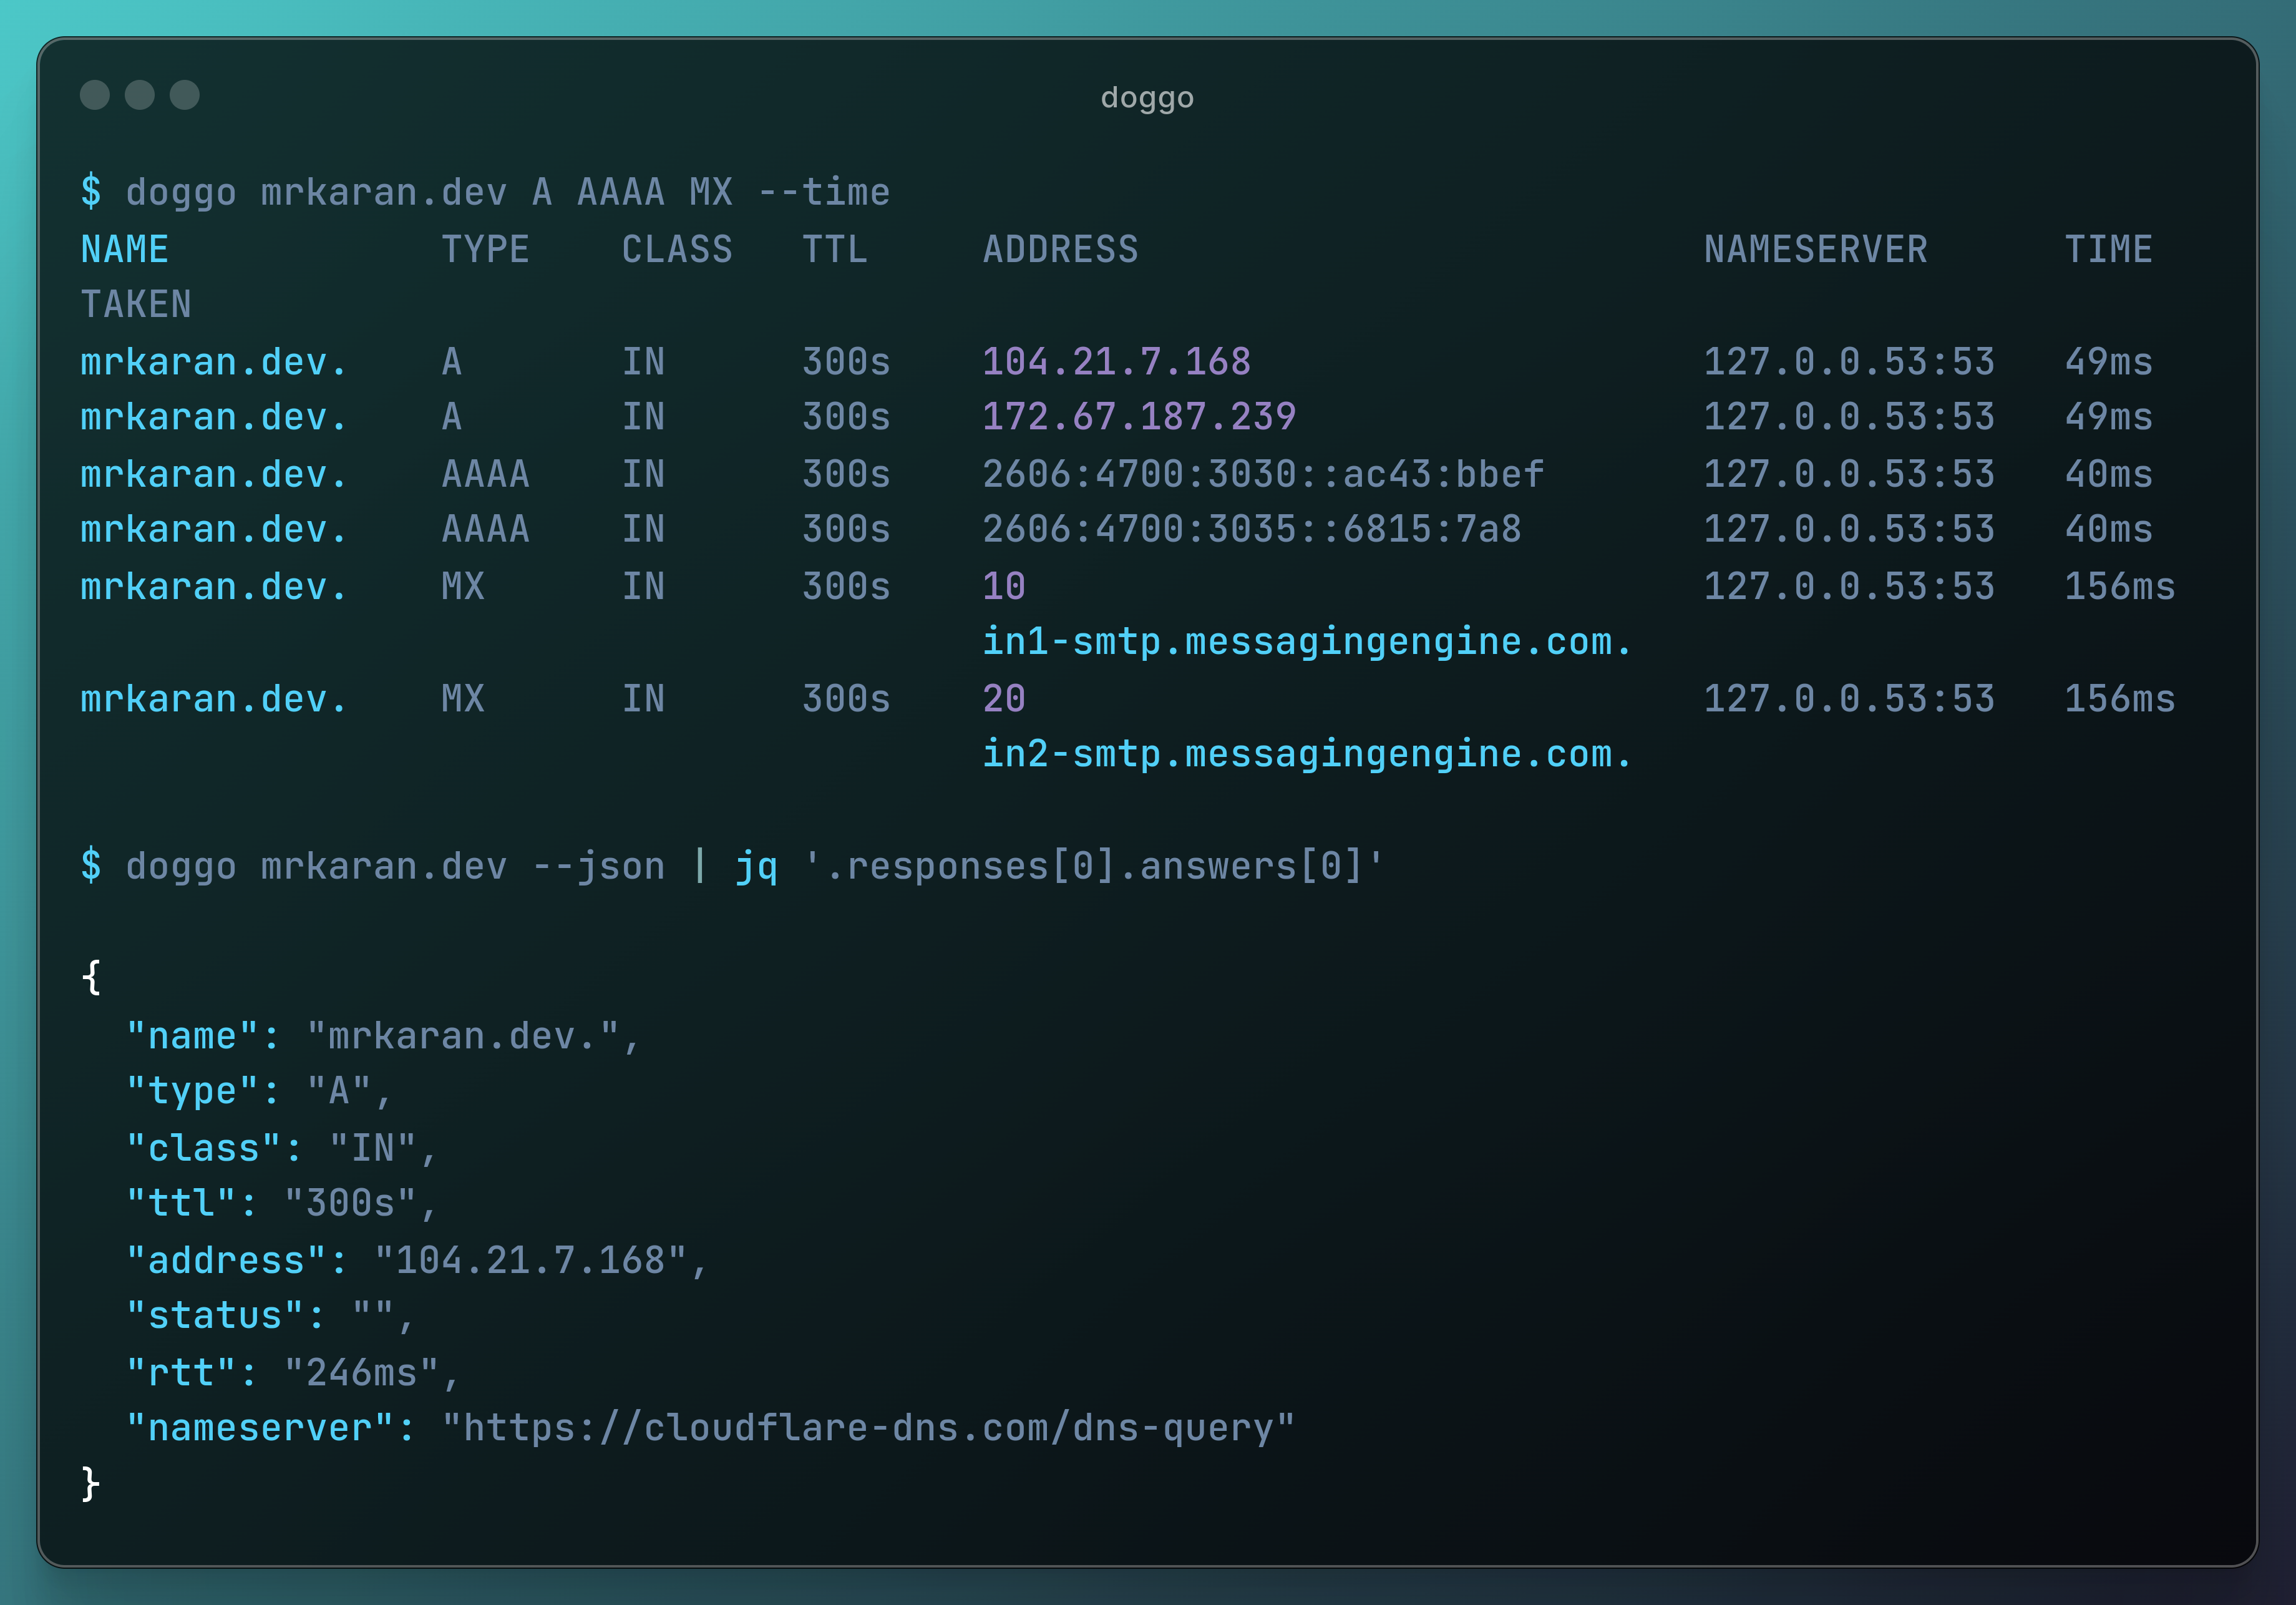
doggo — A command-line DNS client.
It's totally inspired by dog which is written in Rust.
In the past I would use dig to inspect the DNS, but its output is often verbose and difficult to parse visually.
doggo addresses these shortcomings by offering two key improvements:
doggo provides the JSON output support for easy scripting and parsing.
doggo offers a human-readable output format that uses color-coding and a tabular layout to present DNS information clearly and concisely.
To install doggo:
# via Homebrew for macOS
brew install doggo

# via scoop for Windows
scoop install doggo

# via go install
go install github.com/mr-karan/doggo/cmd/doggo@latest
gping — Ping, but with a graph.
The well-known ping command is not the most interesting to look at, and interpreting its output in a useful way can be difficult.
gping gives a plot of the ping latency to a host, and the most useful feature is the ability to run concurrent pings to multiple hosts and plot all of them on the same graph.

To install gping:
# via Homebrew for macOS
brew install gping

# via Chocolatey for Windows
choco install gping

# via apt for Debian
apt install gping
Workstation
tmux — A terminal multiplexer.
Why is tmux such a big deal?
You may have run into situations where you need to view multiple terminal consoles at the same time. For example, you may have a few servers running (for example, web, database, debugger) and you might want to monitor all the output coming from these servers in real-time to validate behavior or run commands.
Before tmux, you might have just opened a few different tabs in the terminal and switched between them to see the output.
Thankfully, there’s an easier way — tmux.
In a nutshell, here are some of its most popular features:
Window/Pane management
Session management with persistence
Sharable sessions with other users
Scriptable configurations
To install tmux:
# via Homebrew for macOS
brew install tmux

# via apt for Debian
apt install tmux

# via pacman for Arch Linux
pacman -S tmux
zellij — A terminal workspace with batteries included.
Since I listed tmux here, it also makes sense to include a new competitor, Zellij, which has been gaining traction in the developer community. Both have their own unique features and purposes.
Compared to traditional terminal multiplexers, zellij offers a more user-friendly interface, modern design elements, built-in layout systems, and a plugin system, making it easier for newcomers to get started.
I still like tmux. It has a special place in my heart because it has served a great purpose for years. But zellij is another good option.
To install zellij:
# via Homebrew for macOS
brew install zellij

# via apt for Debian
apt install zellij

# via pacman for Arch Linux
pacman -S zellij
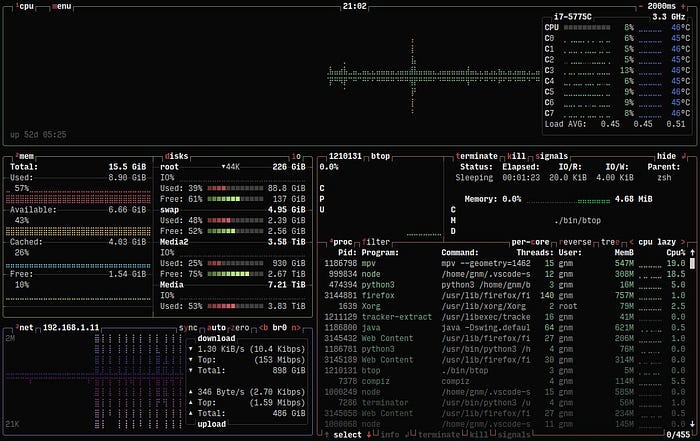
btop — A monitor of resources.
I can’t live without btop, and it’s installed on all my machines via my personal dotfiles. I rarely use now built-in OS GUIs to check the resource utilization on my host machine, because btop can do it much better.
I use to to quickly explore what uses the most memory, monitor and kill some processes, and more.
To install btop:
# via Homebrew for macOS
brew install btop

# via snap for Debian
sudo snap install btop
Conclusion
These CLIs/TUIs should work well in any modern terminal. I personally use Ghostty currently and it works great, but other popular options like iTerm2, Kitty, and the default terminal applications on macOS and Linux should also provide a seamless experience. The key is to ensure your terminal supports features like 256-color palettes and UTF-8 encoding for optimal display of these tools.
There’s a huge amount of CLIs/TUIs out there, and I couldn’t list them all (though I tried to list some of the best). This selection represents a starting point for exploring the rich ecosystem of command-line tools available to developers. I encourage you to explore further, discover new tools that fit your specific needs, and contribute back to the community by sharing your findings.


