


.png)


![‘Companion’ Ending Breakdown: Director Drew Hancock Tells All About the Film’s Showdown and Potential Sequel: ‘That’s the Future I Want for [Spoiler]’](https://variety.com/wp-content/uploads/2025/02/MCDCOMP_WB028.jpg?#)


How to Develop with CodeIgniter on Ubuntu – Step-by-Step Environment Setup
CodeIgniter is a popular open-source PHP framework you can use to build dynamic and robust web applications. It’s simple to use, fast, and flexible. This makes it a good option for any developer who wants to have a light yet powerful framework that w...

CodeIgniter is a popular open-source PHP framework you can use to build dynamic and robust web applications. It’s simple to use, fast, and flexible. This makes it a good option for any developer who wants to have a light yet powerful framework that will let them prototype or develop scalable applications fast.
Also, CodeIgnitor’s MVC (Model-View-Controller) architecture makes the process of organizing code and separating business logic from the user interface a piece of cake, yielding cleaner and maintainable projects.
Whether you’re building a small website or a complex application, CodeIgniter has a bunch of tools, libraries, and helpers that make the development process easier. They help you handle common tasks like database queries, session management, and form validation. Many devs love this tool because of its ease of use, making it an ideal framework for both beginners and experienced coders.
In this guide, I’ll walk you through the process of configuring CodeIgniter step by step, ensuring that you have a fully functional setup for your project on your local development environment.
Prerequisites
Before getting started, make sure you meet the following requirements:
Basic Knowledge of PHP: Understanding PHP syntax and basic programming concepts will help you follow along more easily.
Web Server (for example, Apache or NGINX): CodeIgniter needs a server to run. Make sure you have a working server set up on your local machine or hosting environment.
PHP Installed: You’ll need PHP 7.3 or higher (depending on the version of CodeIgniter you’re using).
Database System: CodeIgniter supports several databases, but MySQL is the most commonly used. Make sure you have access to a database system and know its credentials.
CodeIgniter Download: Download the latest version of CodeIgniter from the official website, GitHub repository, or use
composerto install it.
How to Use Composer to Install CodeIgniter
Now that you understand the prerequisites and have everything set up, let’s move on to installing CodeIgniter. One of the easiest and most efficient ways to install CodeIgniter is by using Composer, a popular dependency management tool for PHP. In this section, I’ll guide you through the steps to install CodeIgniter using Composer.
First, create a new directory using mkdir my_project then navigate to the directory using cd my_project. Run the following Composer command to install CodeIgniter. You can specify the version you want (e.g., ^4.0 for the latest version of CodeIgniter 4).
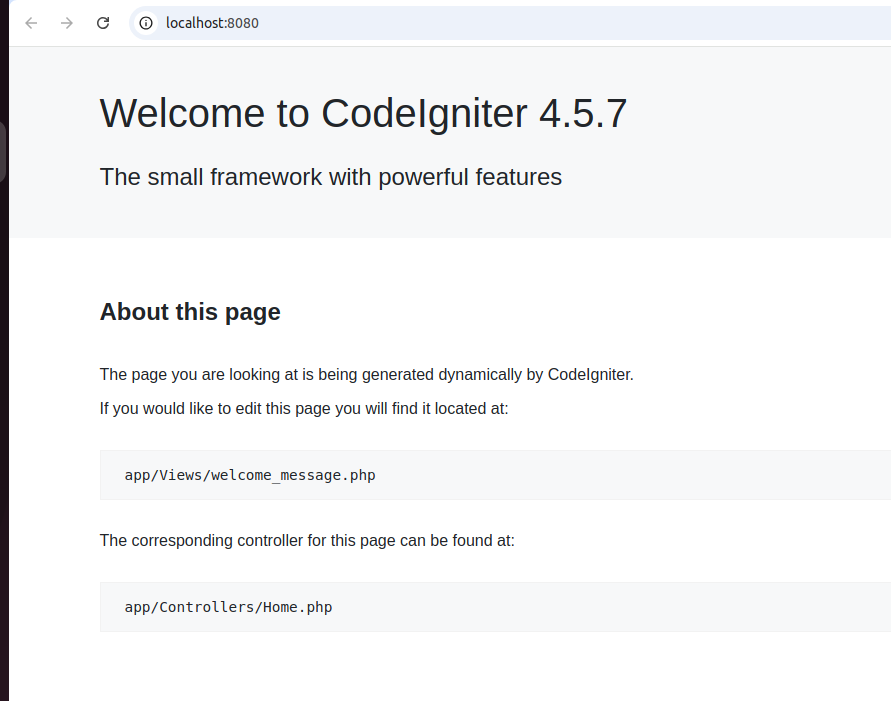
composer create-project codeigniter4/appstarter .
This command will download and install the latest version of CodeIgniter 4 and set up the project for you:
After the installation is complete, you should see the CodeIgniter project structure in your directory. To check if everything is working, you can start the built-in PHP server by running:
php spark serve
Output:

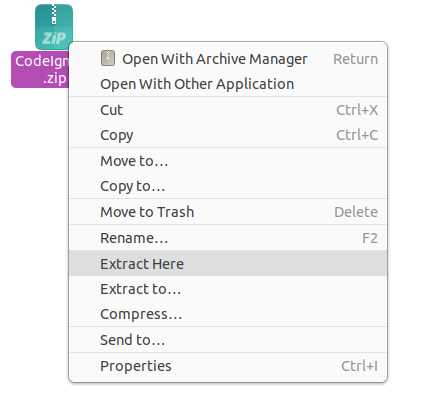
Then, open your browser and go to http://localhost:8080. You should see the CodeIgniter welcome page.
How to Install CodeIgniter Manually
If you prefer not to use Composer, or if you’re working in an environment where Composer isn’t available, you can manually install CodeIgniter. This method involves downloading the framework files directly and setting up your project manually. While it requires a few more steps than using Composer, it’s still straightforward and gives you full control over the installation process.
In this section, I’ll walk you through the steps to manually install CodeIgniter and configure it for your project.
Download via Git:
cd /var/www/html
sudo git clone https://github.com/bcit-ci/CodeIgniter.git codeigniter
Or download as ZIP (from CodeIgniter official website): Download here. Extract it in /var/www/html. Whereby you can do so using the terminal or UI.
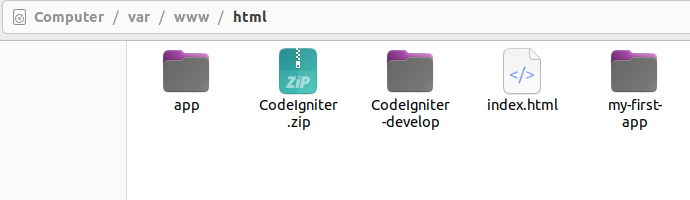
Extracting the ZIP File via the UI:
If you’re not comfortable using command-line tools, you can easily extract the ZIP file using your computer’s graphical interface. Here's how:
Click on files/Other Locations/computer to access /var/www/html. Copy the .Zip file you downloaded earlier in the created folder and right click. Then click on extract here to unzip it.
Extracting the ZIP File via the Terminal:
If you’re comfortable using the command line, you can extract the CodeIgniter ZIP file directly via the terminal. This method is especially useful for Linux and macOS users or if you're working on a remote server without a graphical user interface.
First, ensure you have unzip installed on your Ubuntu system:
sudo apt update
sudo apt install unzip
Check your permissions to ensure that you have the necessary access to the /var/www/html directory. If needed, use sudo for administrative privileges.
Steps to Extract the File
Assuming your uploaded file is currently located in downloads/data…, move it to /var/www/html:
sudo mv /mnt/data/CodeIgniter.zip /var/www/html
Navigate to the /var/www/htmldirectory:
cd /var/www/html
Extract the ZIP file by using the unzip command to extract the contents:
sudo unzip CodeIgniter.zip
After extracting, set the correct ownership and permissions for web server access:
sudo chown -R www-data:www-data /var/www/html
sudo chmod -R 755 /var/www/html
www-data(first part) → The user.
www-data(second part) → The group.
change
Codeigniter-develop /bcit-ci-CodeIgniter-bcb17eb/….folder name to just codeigniter
Verify Extraction
Visit your web server's URL (for example, http://localhost) to check if the contents are correctly deployed.
Set Folder Permissions
After installing CodeIgniter, make sure you have the correct permissions for your directories, particularly writable and cache directories. This ensures that CodeIgniter can write logs, cache files, and session data.
Run the following commands to set the correct permissions:
sudo chmod -R 755 /var/www/html/codeigniter
Configure the Base URL
The base URL for your project needs to be set up in application/config/config.php.
Open the config.php file:
sudo nano /var/www/html/codeigniter/application/config/config.php
Output:

Set the base_url as follows:
$config['base_url'] = 'http://your-domain-or-ip/';
Replace http://your-domain-or-ip/ with your actual domain or IP address where the project will be accessible.
After making changes:
Save the file: Press
Ctrl + O(Write Out).Confirm the filename: Press
Enter.Exit the editor: Press
Ctrl + X.